- Home
- Features
- Business
- Active
- Sports
- Shop
Top Insights
How to delegate your GRT tokens in The Graph using Coinbase Wallet

A staking guide for The Graph using Coinbase Wallet
This article is available also in these other languages:
- 🇸🇦 اللغة العربية
- 🇨🇳 简体中文
- 🇯🇵 ジャパニ
- 🇩🇪 Deutsch
- 🇪🇸 Español
- 🇫🇷 Français
- 🇮🇹 Italiano
- 🇷🇺 Русский
- 🇺🇦 Yкраїнська
- 🇰🇷 한국어
In this article we are going to show you how to delegate your GRT tokens within The Graph protocol, using Coinbase Wallet. As you may already know, Coinbase has an incredibly easy-to-use web3 wallet that is available both as a browser extension and as a mobile app for both iOS and Android. It is super straightforward and the best wallet for everyone that wants to start exploring web3 applications, even newbies!

If this all sounds rather confusing, read our previous article about what a web3/crypto wallet is:
What is a Web3 Wallet and Why You Absolutely Need One
Recently, Coinbase launched a revamped version of its wallet, as you can see from their announcement on Twitter here:
Coinbase Wallet on Twitter: "5/ Redesigned mobile appAs a reminder, the new Coinbase Wallet app is now available to iOS and Android users! 📱 All-new design⛓️ Multichain support, including Solana🖼️ Improved NFT experience Download or upgrade today → https://t.co/WfByHTh99z pic.twitter.com/Gna9S9uMBu / Twitter"
5/ Redesigned mobile appAs a reminder, the new Coinbase Wallet app is now available to iOS and Android users! 📱 All-new design⛓️ Multichain support, including Solana🖼️ Improved NFT experience Download or upgrade today → https://t.co/WfByHTh99z pic.twitter.com/Gna9S9uMBu
The Process
Let’s see how easy it is to delegate your Graph ($GRT) tokens using the mobile wallet app on iPhone.
If you’d prefer to watch a video, we have also made an easy to follow tutorial that showcases everything written in the steps below:
- To begin, first you need to have both GRT and some ETH in your Coinbase Wallet. The ETH is used to approve transactions. Since Coinbase Wallet is multi-chain, this means you can manage all ERC20 tokens including GRT, LINK, USDC, USDT, or Solana (SOL), and many more.
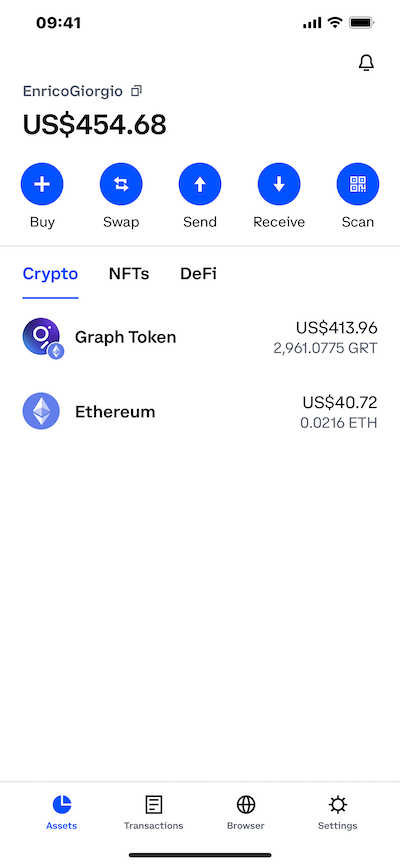
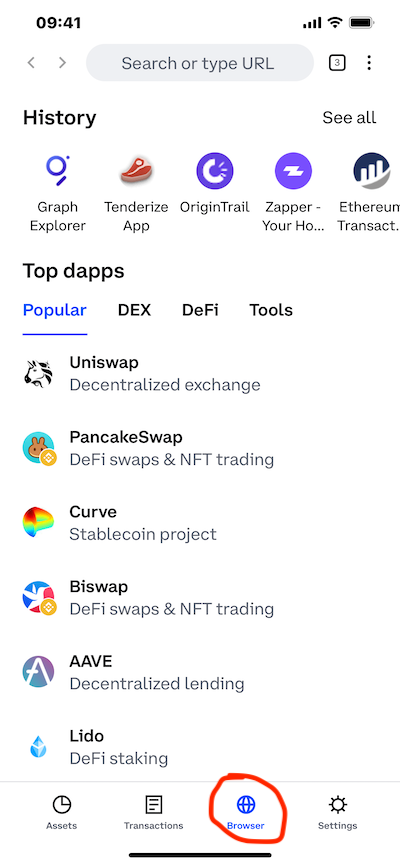
2. Now that you have your GRT and ETH in your wallet, tap on the Browser icon to open a new window showing your browsing history and some suggested top dApps to use.
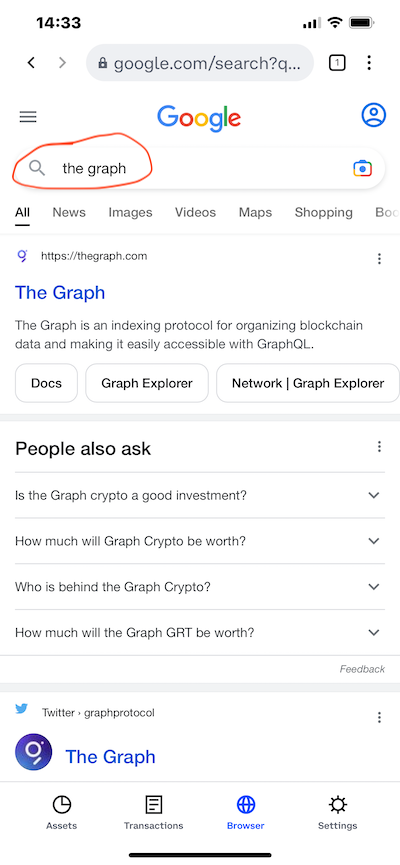
3. Type the url in the address bar at the top of the page to navigate to The Graph official website: https://thegraph.com, or use Google to search. Double check the url of the page is correct before continuing on.
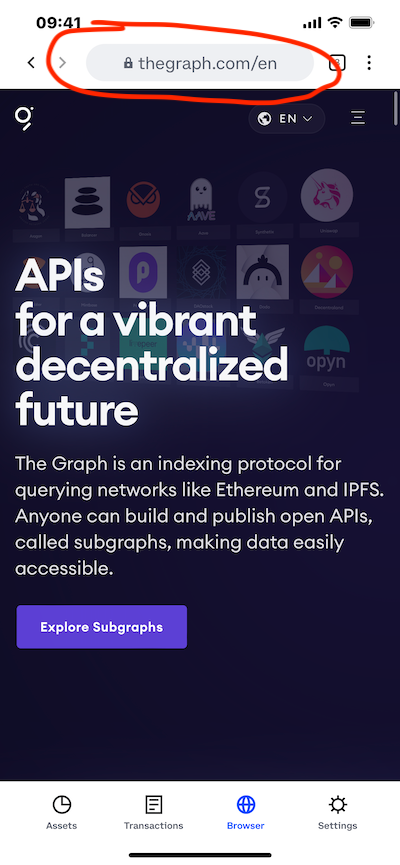
4. Once the home page of The Graph is loaded, you can tap on the top right of the screen to open the menu, then tap on Products, and then Graph Explorer.
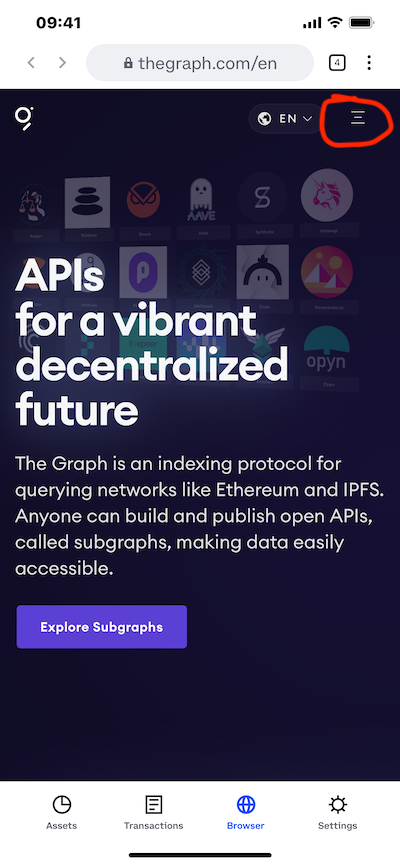
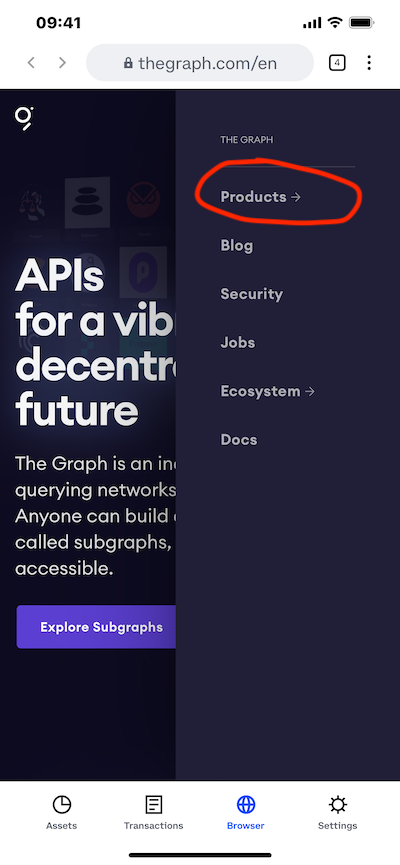
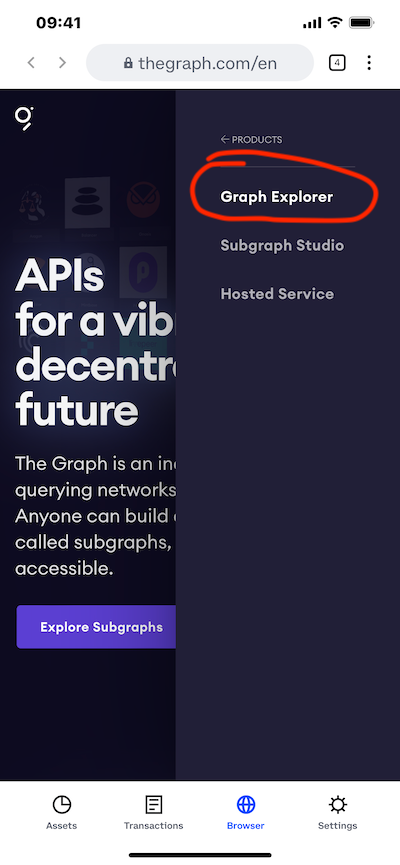
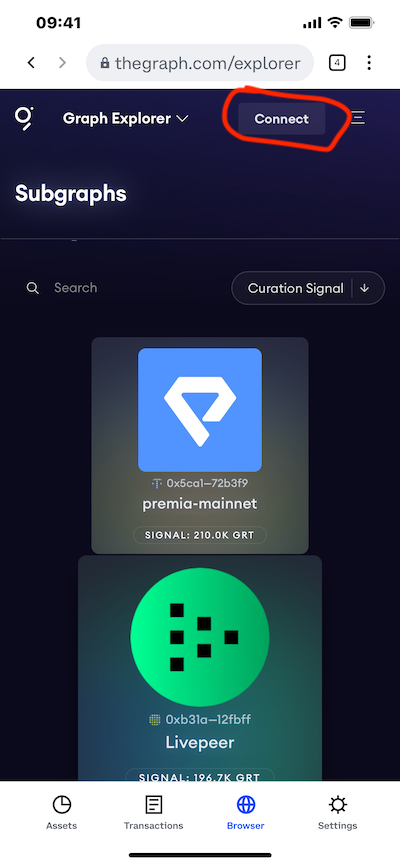
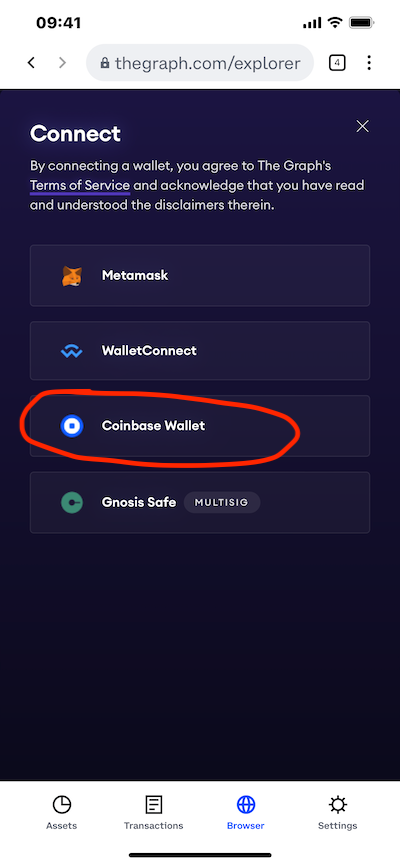
5. Now, you need to connect your wallet with The Graph app by tapping on Connect at the top of the screen, and then choose Coinbase Wallet.
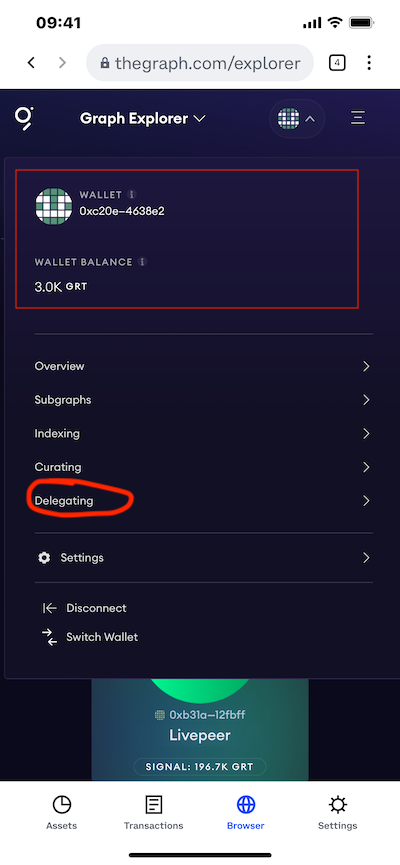
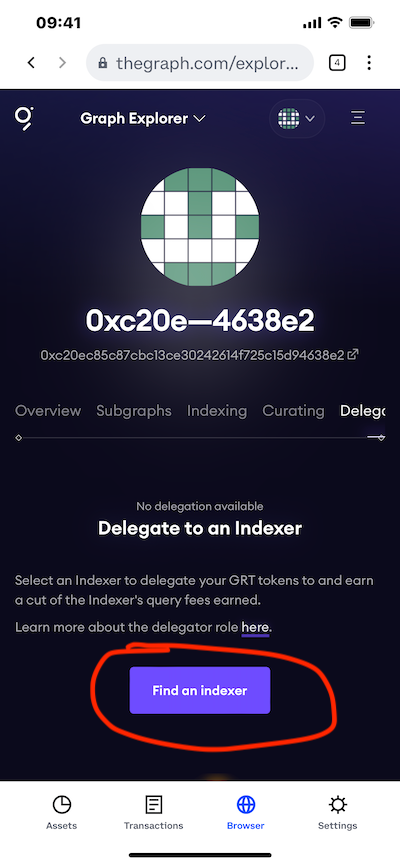
6. You will see your profile page with the balance of GRT you have in your wallet. From here you can tap on Delegating, and then on Find an indexer.
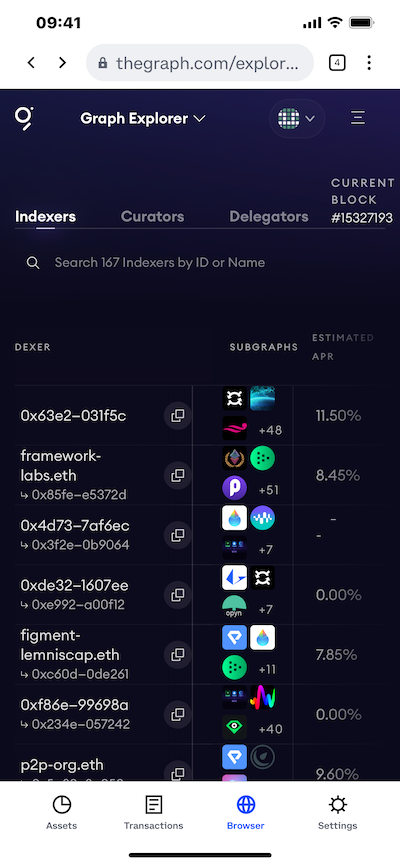
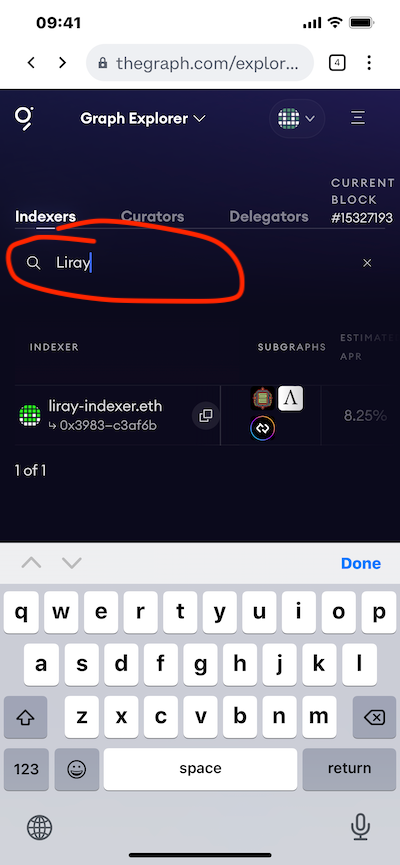
7. Here you will see the list of available indexers. Let’s assume that you have already selected your indexer. You now need to find them from the list. In the search field, begin typing the name of your indexer (ENS name) or its address. In our example we chose ‘liray-indexer’ so we began typing the name and after a few seconds the indexer popped up in the results. Next, tap on the name of the indexer.
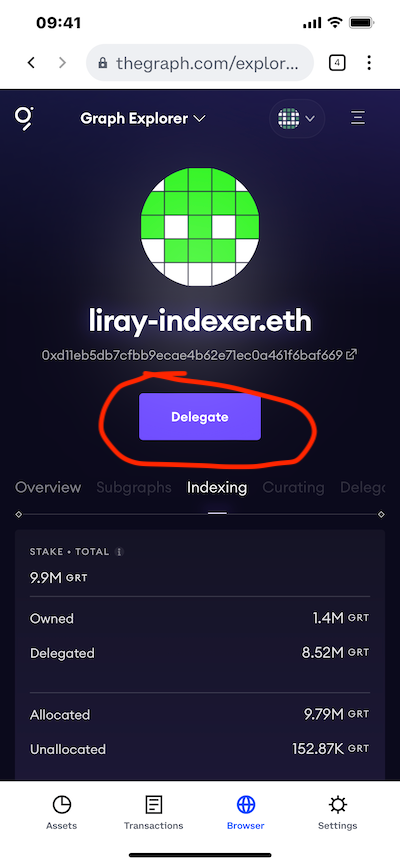
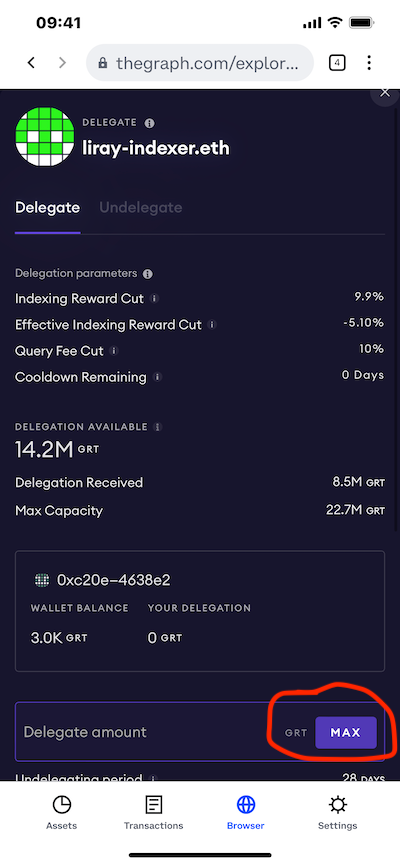
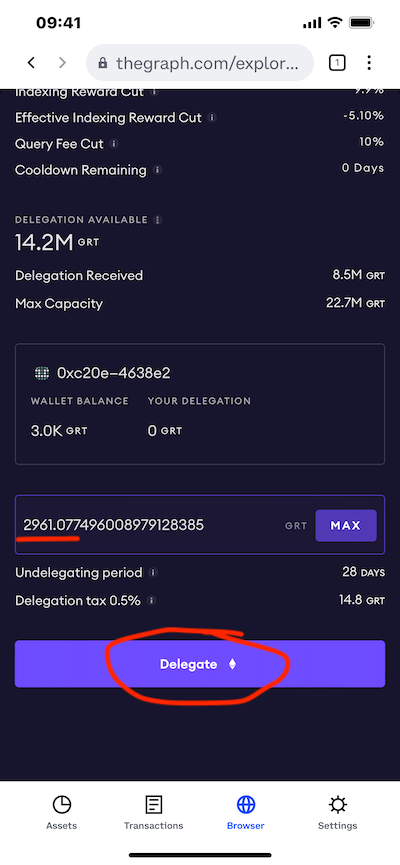
8. Once you open the indexer profile page, you can click on Delegate and then, in the next window you can type the amount of GRT you want to delegate. Alternatively, as shown in our example, you can tap the MAX button to delegate all your GRT tokens that you currently have in your wallet.
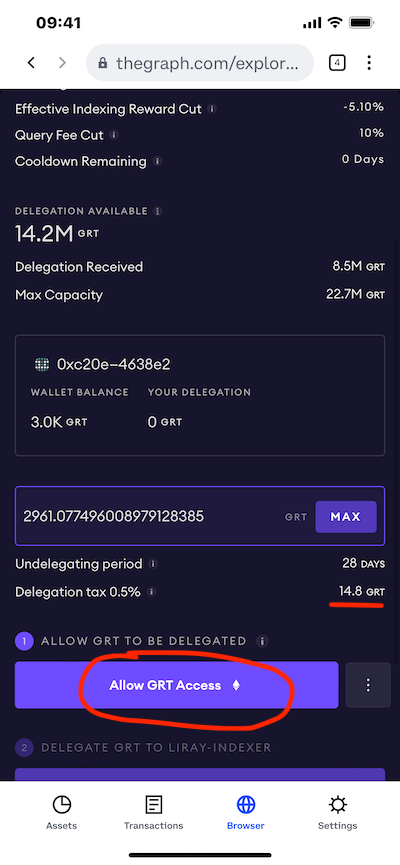
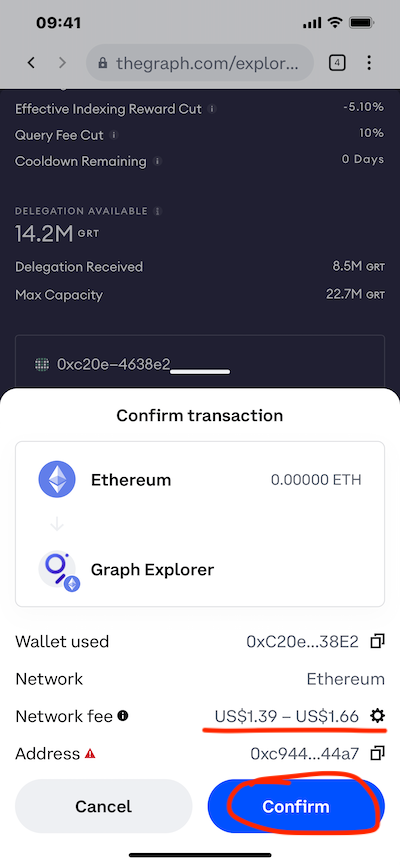
9. If this is the first time you are delegating from this wallet, you will need to authorize the app to use the GRT balance from your wallet. (This transaction is only needed the first time you interact with The Graph app. The next time you delegate from this same wallet, you won’t need to do this approval again.) Tap on Allow GRT Access. You then need to approve the transaction, which includes paying some ETH to cover network fees. Tap Confirm to approve.
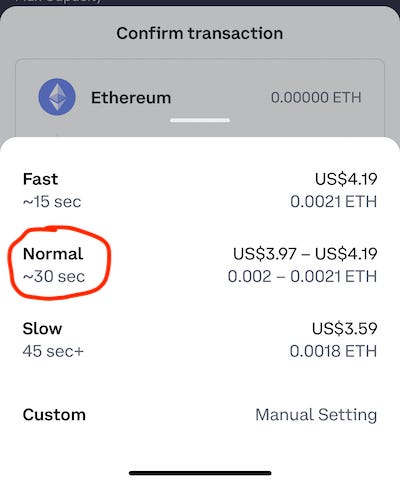
10. Finally, the last step to complete the process is to tap on Delegate, and then confirm the transaction. In our example case this will cost approximately $5 accordingly to the estimation. Tap on Confirm to submit the transaction (read below first if you’d like learn more about the fee and speed options).
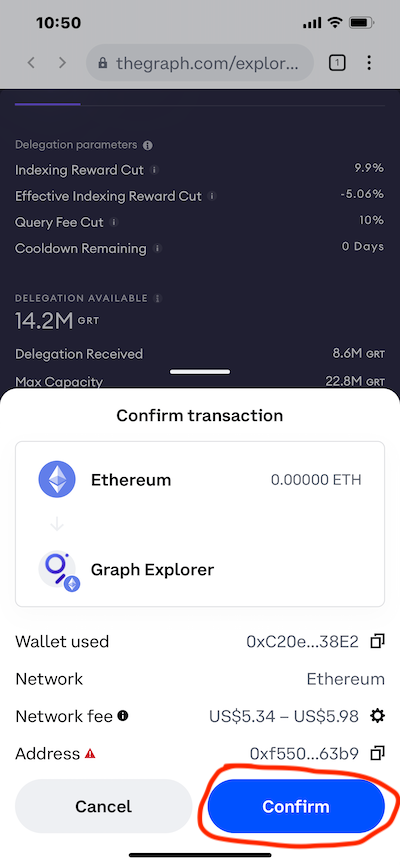
Please note that the real cost of the transaction will be much less. In our example we saw the estimation was $5 but the actual gas fee incurred was just $1.78. Check the full transaction here for yourself.

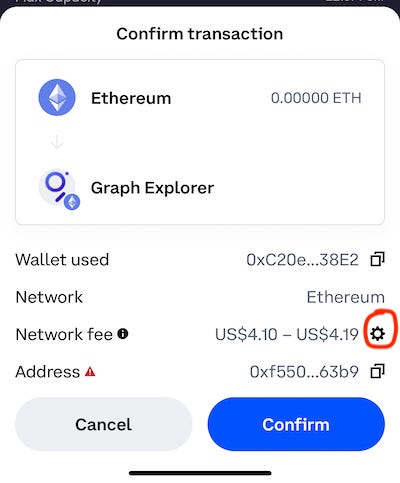
If you’d like to edit the speed of the transaction, you can do so by tapping the gear icon next to Network fee. If you select Fast you will have to pay more in terms of ETH to approve it. Coinbase Wallet uses Normal as standard, typically taking about 30 second to get approved.
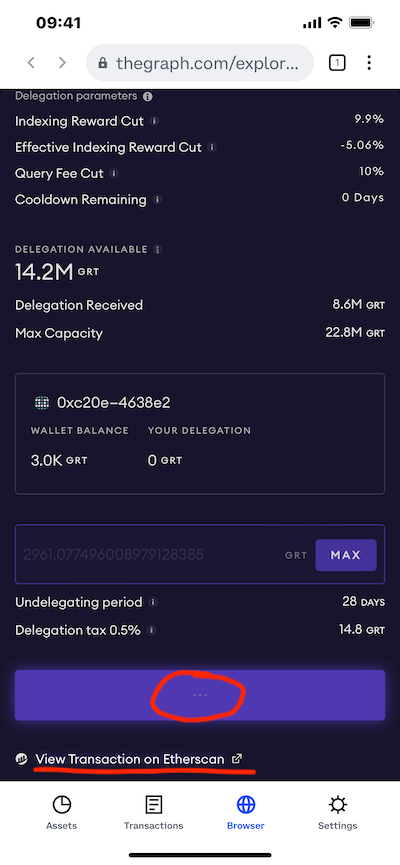
11. Once you have confirmed your transaction it will start to get processed and you will see three dots (…) flashing on the blue button, with a link to view the transaction on Etherscan below. In approximately 30 seconds your delegation will be confirmed and the button will turn green with a label confirming the delegation took place. In our example you can see it read “Delegated 3.0K GRT”.
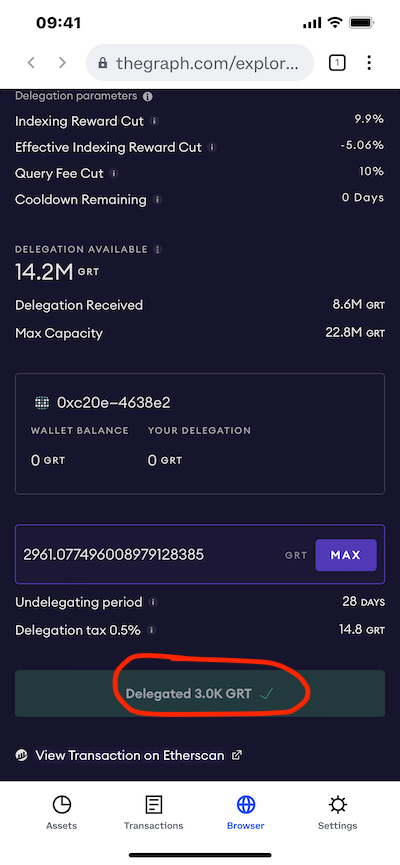
This concludes our article on how to delegate your GRT tokens using Coinbase Wallet. If you want to check your rewards, you can use The Graph Explorer or our own Graphtronauts App which is super easy to use, mobile friendly, and offers a sleek user interface to track your GRT delegation(s).
From within our App you can tap on Add a Wallet, type in your ENS name (Ethereum Name Service) or copy your wallet address, and then tap on Add wallet.
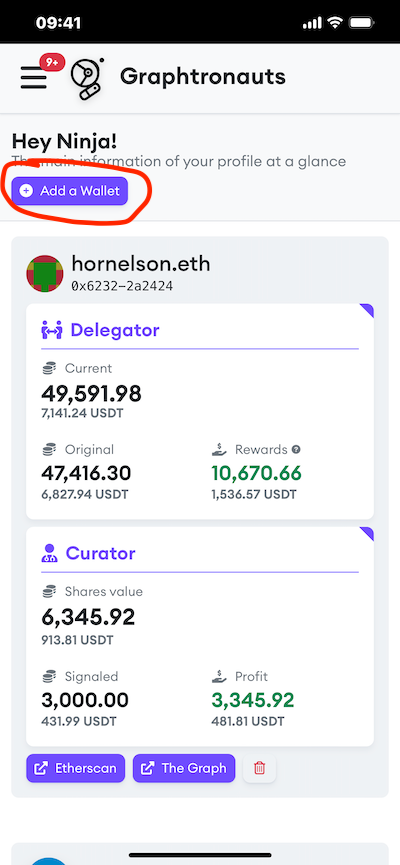
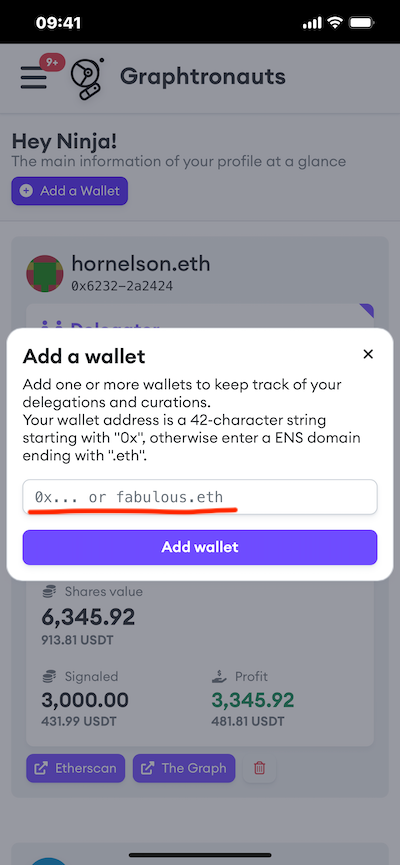
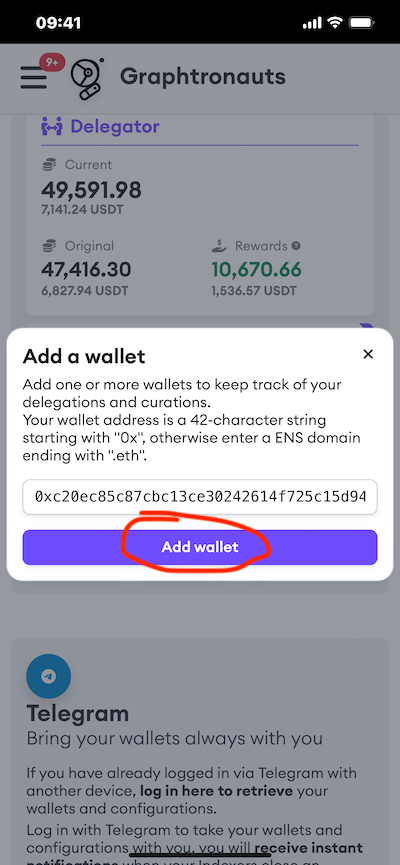
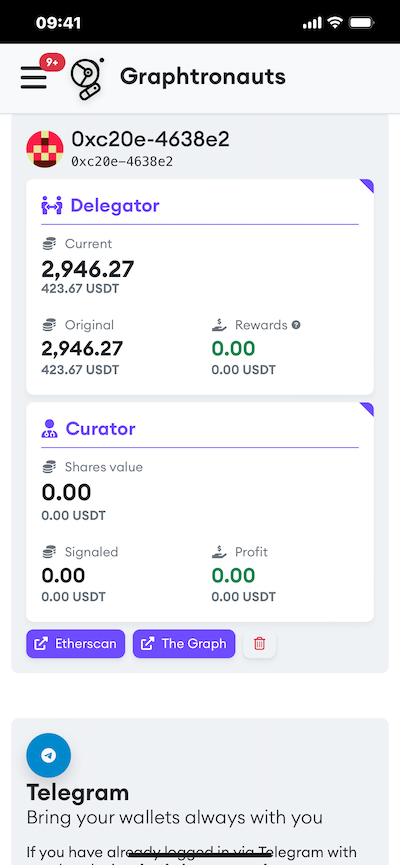
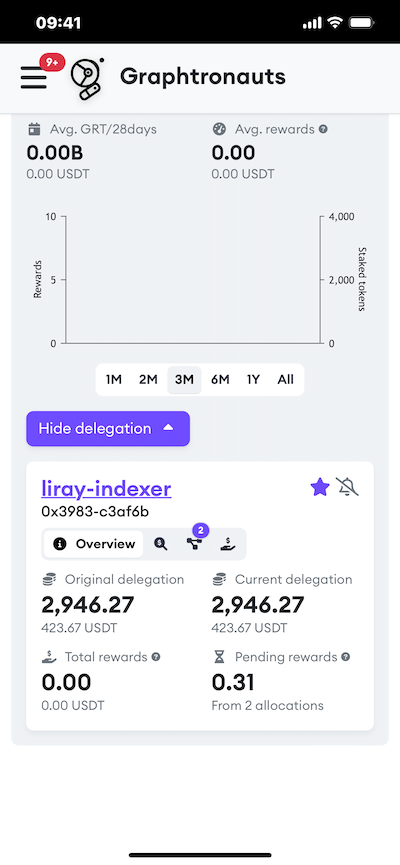
From here you have access to a lot of data and statistics regarding your indexers and delegations, including your pending rewards which are calculated in real time. Plus, you have the ability to receive real time notifications every time you receive rewards.
For further info, feel free to join our Telegram group here.
If something is still not clear about delegating your GRT tokens with The Graph, we have prepared an article where we answer the most common Frequently Asked Questions for Delegators, you can read here:
Do you have any questions?
Graphtronauts is the largest, unofficial community for long-term GRT holders who believe in The Graph’s web3 vision for the future. Our goal is to educate the broader crypto community and help them become contributing members within The Graph ecosystem.
If you have any questions, or concerns, or want to submit feedback, you can reach out to us using our social channels:
- App: graphtronauts.app
- Telegram: t.me/graphtronauts
- Twitter: twitter.com/graphtronauts_c
- YouTube: youtube.com/@graphtronauts
- Blog: blog.graphtronauts.com
- Warpcast: warpcast.com/~/channel/graphtronauts
- Reddit: reddit.com/r/Graphtronauts
- LinkedIn: linkedin.com/company/graphtronauts

Graphtronauts indexer is live on The Graph!
You can read our official launch announcement here.
If you want to delegate to us, you can go directly in Graph Explorer, using the link here.

You can contact us using our dedicated social channels for our Indexer operation:
- Twitter: @graphtronauts_x
- Discord: Join our Server
- Telegram: @GraphtronautsIndexer
- Delegate to us
How to delegate your GRT tokens in The Graph using Coinbase Wallet was originally published in Coinmonks on Medium, where people are continuing the conversation by highlighting and responding to this story.
Recent Posts
Categories
Related Articles
Crypto derivatives platform BitMEX is seeking a buyer: report
Crypto derivatives platform BitMEX is on sale, according to sources familiar with...
ByglobalreutersFebruary 27, 2025Dirty Crypto: MELANIA And LIBRA Wallets Tied To Money Laundering?
Crypto investigators have flagged suspicious transactions linked to wallets associated with MELANIA...
ByglobalreutersFebruary 27, 2025XRP Outshines 92% Of Altcoins, Analysis Shows—Here’s Why
XRP stood firm as crypto markets took a beating on Tuesday. Most...
ByglobalreutersFebruary 27, 2025Bitcoin on-chain indicators at bull-bear boundary, warns CryptoQuant CEO
Market uncertainty and shifting institutional sentiment could lead to increased volatility, impacting...
ByglobalreutersFebruary 27, 2025


Leave a comment